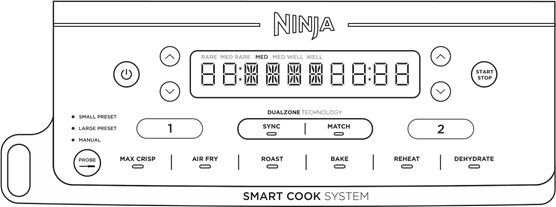
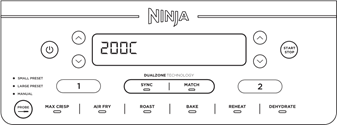
- Use the PROBE button to select either Small or Large preset, depending on size of protein. Reference your Quick Start Guide for guidance. Use the arrows on the left of the display to select your protein and the arrows on the right of the display to set your preferred internal outcome of your food. If using the Manual button, use the recommended internal cook temperatures below.
- If using the Manual button, use the recommended internal cook temperatures below.
| FOOD TYPE: | SET OUTCOME TO: |
| Fish | Medium Rare (50°C) |
| Medium (55°C) |
| Medium Well (60°C) |
| Well (65°C) |
| Chicken/Turkey | Well (75°C) |
| Pork | Medium (55°C) |
| Medium Well (65°C) |
| Well (70°C) |
| Beef/Lamb | Rare (50°C) |
| Medium Rare (55°C) |
| Medium (60°C) |
| Medium Well (65°C) |
| Well (70°C) |
Using SYNC with Probe
- Refer to steps 1-3 in the previous section for instructions on setting up the probe.
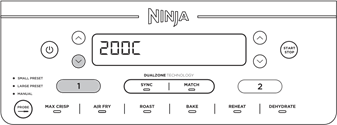
- Press Zone 1 and select desired cooking function. Use the PROBE button to select either the Small or Large preset, depending on size of protein (refer to Quick Start Guide for guidance). Use the arrows on the left-hand side to select the protein and the arrows on the right-hand side to select desired outcome.
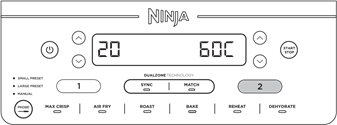
- Press Zone 2 and select desired cooking function. Set time and temperature and select SYNC. Press the START/STOP button to begin cooking.
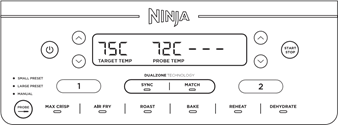
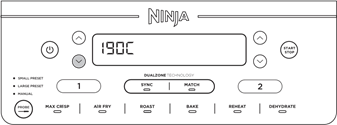
NOTE: During the initial setup, the Zone with the shorter cook time will display HOLD. The display will then transition to showing the probe's current and target temperature in Zone 1 and progress bars in Zone 2.
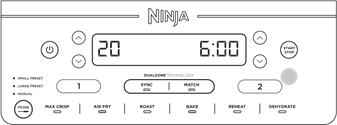
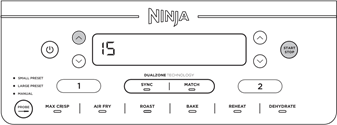
- Whilst Zone 1 continues to reach target temperature, Zone 2 will begin cooking. The display will show progress bars during the cook cycle. Select Zone 2 to see the remaining cook time.
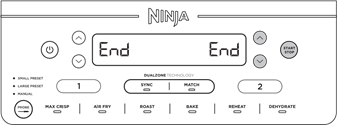
- When cooking is complete in both Zones, "rest" will appear on the display for Zone 1. The display will then flash "COOL" 3 times and then "End".
Using MATCH with Probe
- Press Zone 1 and select desired cooking function. Use the left-hand arrows to select desired cook temperature. Use the PROBE button to select Small Preset or Large Preset, depending on the size of the protein. Reference the Quick Start Guide for guidance. If using the Manual button, use the recommended internal cook temperatures.
Use the arrows on the right of the display to select your desired protein and the arrows on the left of the display to set the internal outcome.
- Select MATCH, then press the START/ STOP button to begin cooking.
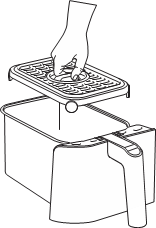
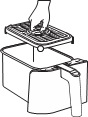
HOW TO CORRECTLY INSERT THE PROBE
NOTE: DO NOT use the probe with frozen protein or for cuts of meat thinner than 1.5cm.
Reference Quick Start Guide for preset cooking chart when using SYNC and MATCH with the Probe.
COOKING IN YOUR AIR FRYER
REFERENCE QUICK START GUIDE FOR RECIPES AND COOKING CHARTS
COOKING WITH DUAL ZONE TECHNOLOGY
Dual Zone Technology utilises two cooking Zones to increase versatility. The Sync feature ensures that, regardless of different cook settings, both Zones will finish ready to serve at the same time.
For detailed instructions on using each function, see later sections.
SYNC (without Probe)
To finish cooking at the same time when foods have different cook times, temperatures or even functions:
- Place ingredients in the drawers, then insert drawers in unit and the press the power button.
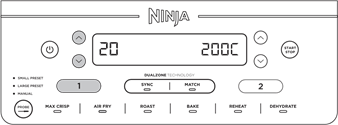
- Zone 1 will remain illuminated. Select the desired cooking function. Use the left arrows to set the temperature and use the right arrows to set the time.
- Select Zone 2, then select the desired cooking function. Use the left arrows to set the temperature and use the right arrows to set the time.
NOTE: You can select a different function for Zone 2.
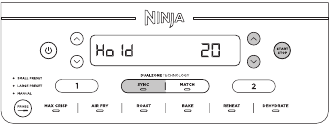
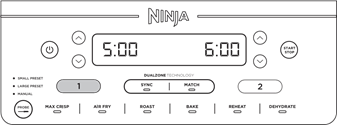
- Press SYNC, then press the START/STOP button to begin cooking in the Zone with the longest time. The other Zone will display Hold. The unit will beep and activate the second Zone when both Zones have the same time remaining.
NOTE: It is recommended to shake your food during cooking. Cooking with automatically pause when a drawer is removed. Re-insert drawer to resume cooking.
NOTE: If you decide the food in one of the Zones is done cooking before the cook time is up, you can STOP A ZONE. Select that Zone, then press START/STOP button to pause the zone or set the time to zero. See later sections for further instructions.
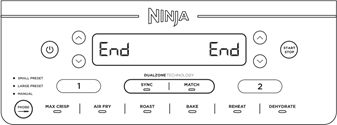
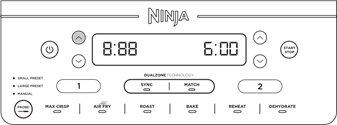
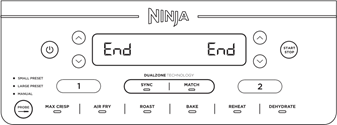
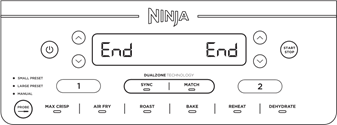
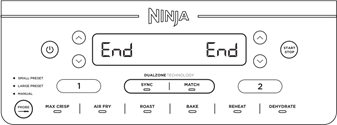
- When cooking is complete, the unit will beep and "End" will appear on the display.
- Remove ingredients by tipping them out or using silicone-tipped tongs/utensils.
MATCH (without probe)
To cook a larger amount of the same food or cook different foods using the same function, temperature and time:
- Place ingredients in the drawers, then insert drawers in unit and then press the power button.
- Zone 1 will remain illuminated. Select the desired cooking function. Use the left arrows to set the temperature and use the right arrows to set the time.
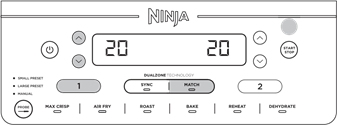
- Press the MATCH button to copy the Zone 1 settings to Zone 2. Then press the START/STOP button to begin cooking in both Zones.
NOTE: It is recommended to shake your food during cooking. To keep the time at a synchronised finish, press the START/ STOP button to pause both Zones. To pause a single Zone during Dual Zone cooking, refer to later sections.
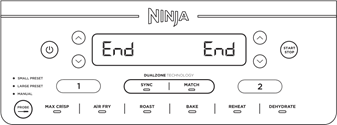
- "End" will appear on both screens when cooking ends at the same time.
- Remove ingredients by tipping them out or using silicone-tipped tongs/utensils.
COOKING WITH TWO ZONES
When SYNC or MATCH are not selected, technology is integrated into the design to automatically optimise the distribution of power when using two Zones with different cook times. This means the food in the Zone with the longer cook time may finish cooking before the set time ends.
Check food frequently to avoid overcooking.
- Select Zone 1, then select the desired function. Use the left arrows to set the temperature.
- Use the right arrows to set the time.

- Select Zone 2 and repeat steps 1 and 2.
- Press the START/STOP button to begin cooking in both Zones.
- When cooking is complete in the zone with the shorter cook time, the power will then shift to help optimise cook time in the remaining zone.
- Continue to monitor food, as it may finish cooking before the set cook time ends.
- Remove ingredients by tipping them out or using silicone-tipped tongs/utensils.
ENDING THE COOK TIME IN ONE ZONE (WHILE USING BOTH ZONES)
- Select the Zone you would like to stop.
- Then press the down right arrows to set the time to zero.
- Once you have set the time to zero, press the START/STOP button.
- The time in that zone is then cancelled and "End" will appear on the display. Cooking will continue in the other zone.

NOTE: This is not available when using SYNC and the Probe.
PAUSING COOKING
Cooking will automatically pause when a drawer is removed. Re-insert drawer to resume cooking.
WHEN USING IN SYNC or MATCH MODE
If you open a drawer, the other drawer will automatically pause so that cooking will still finish at the same time. Reinsert drawer to continue cooking in both zones.
COOKING IN A SINGLE ZONE

To turn on the unit, plug the power cord into a wall socket, then press the power button.
Max Crisp
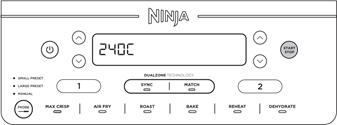
NOTE: There is no temperature adjustment available or necessary when using the Max Crisp function. The temperature is preset to 240°C.
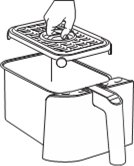
- Install crisper plate in the drawer, then place ingredients in the drawer and insert drawer in unit.

- The unit will default to Zone 1 (to use Zone 2 instead, select Zone 2). Select MAX CRISP.
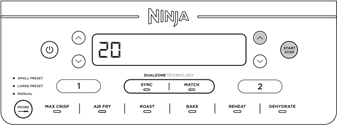
- Use the right arrows to set the time in 1-minute increments up to 30 minutes. Press the START/STOP button to begin cooking.
- When cooking is complete, the unit will beep and "End" will appear on the display.
- Remove ingredients by tipping them out or using silicone-tipped tongs/utensils.
Air Fry
NOTE: The temperature is preset to 200°C.
- Install crisper plate in the drawer, then place ingredients in the drawer and insert drawer in unit.
- The unit will default to Zone 1 (to use Zone 2 instead, select Zone 2). Select AIR FRY.
- Use the left arrows to set the desired temperature.

NOTE: During cooking, you can remove the drawer and shake or toss ingredients for evening crisping. If you would like to pause during this time, press the zone number then press the START/STOP button. If using a single zone, simply press the START/STOP button.
- Use the right arrows to set the time in 1-minute increments up to 90 minutes. Press the START/STOP button to begin cooking.
NOTE: During cooking, you can remove the drawer and shake or toss ingredients for evening crisping. If you would like to pause during this time, press the zone number then press the START/STOP button. If using a single zone, simply press the START/STOP button.
- When cooking is complete, the unit will beep and "End" will appear on the display.
- Remove ingredients by tipping them out or using silicone-tipped tongs/utensils.
Roast
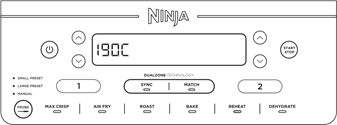
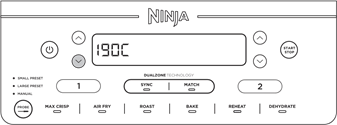
NOTE: The temperature is preset to 190°C
- Install crisper plate in the drawer (optional), then place ingredients in the drawer and insert drawer in unit.
- The unit will default to Zone 1 (to use Zone 2 instead, select Zone 2). Select ROAST.

- Use the left arrows to set the desired temperature.
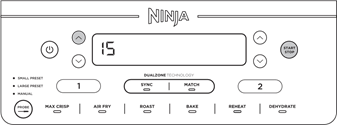
- Use the right arrows to set the time in 1-minute increments up to 1 hour and in 5-minute increments from 1 to 4 hours. Press the START/STOP button to begin cooking.
- When cooking is complete, the unit will beep and "End" will appear on the display.
- Remove ingredients by tipping them out or using silicone-tipped tongs/utensils.
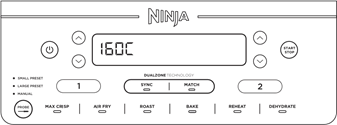
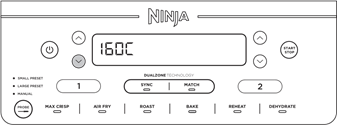
Bake
NOTE: The temperature is preset to 160°C
- Install crisper plate in the drawer (optional), then place ingredients in the drawer and insert drawer in unit.
- The unit will default to Zone 1 (to use Zone 2 instead, select Zone 2). Select BAKE.
NOTE: To convert recipes from a traditional oven, reduce the temperature by 10°C.
- Use the left arrows to set the desired temperature.
- Use the right arrows to set the time in 1-minute increments up to 1 hour and in 5-minute increments from 1 to 4 hours. Press the START/STOP button to begin cooking.

- When cooking is complete, the unit will beep and "End" will appear on the display.
- Remove ingredients by tipping them out or using silicone-tipped tongs/utensils.
Reheat
NOTE: The temperature is preset to 170°C
- Install crisper plate in the drawer (optional)then place ingredients in the drawer and insert drawer in unit.
- The unit will default to Zone 1 (to use Zone 2 instead, select Zone 2). Select REHEAT.
- Use the left arrows to set the desired temperature.
- Use the right arrows to set the time in 1-minute increments up to 1 hour. Press the START/STOP button to begin cooking.
- When reheating is complete, the unit will beep and "End" will appear on the display.
- Remove ingredients by tipping them out or using silicone-tipped tongs/utensils.
Dehydrate
NOTE: The temperature is preset to 60°C
- Place a single layer of ingredients in the drawer. Then install the crisper plate in the drawer on top of the ingredients and place another layer of ingredients on the crisper plate.
- The unit will default to Zone 1 (to use Zone 2 instead, select Zone 2). Select DEHYDRATE. The default temperature will appear on the display. Use the left arrows to set the desired temperature.
- Use the right arrows to set the time in 15-minute increments from 1 to 12 hours. Press the START/STOP button to begin cooking.
- When cooking is complete, the unit will beep and "End" will appear on the display.
- Remove ingredients by tipping them out or using silicone-tipped tongs/utensils.
CLEANING & MAINTENANCE
The unit should be cleaned thoroughly after every use. Unplug the unit from the plug socket and wait until the unit is fully cooled before cleaning.
To clean the main unit and the control panel, wipe them clean with a damp cloth
NOTE: NEVER immerse the main unit in water or any other liquid. NEVER clean the main unit or drawer in a dishwasher.
The drawers can be washed in the dishwasher or by hand. If hand-washing, air-dry or towel-dry all parts after use.
*To extend the life of your drawers, we recommend hand-washing them.
Do not place the probe in the dishwasher or immerse it in water or any other liquid.
Wipe clean with a damp cloth.
If food residue is stuck on the crisper plates or drawers, place them in a sink filled with warm, soapy water and allow to soak.
HELPFUL TIPS
- For consistent browning, make sure ingredients are arranged in an even layer on the bottom of the drawer with no overlapping. If ingredients are overlapping, make sure to shake them halfway through cooking.
- To convert recipes from your conventional oven, reduce the temperature by 10°C. Check food frequently to avoid overcooking.
- Occasionally, the fan from the air fryer will blow lightweight foods around. To alleviate this, secure foods (like the top slice of bread on a sandwich) with cocktail sticks.
- The crisper plates elevate ingredients in the drawers so air can circulate under and around ingredients for even, crisp results.
- After selecting a cooking function, you can press the START/STOP button to begin cooking immediately. The unit will run at the default temperature and time.
- For best results with fresh vegetables and potatoes, use at least 1 tablespoon of oil. Add more oil as desired to achieve the preferred level of crispiness.
- For best results, check progress throughout cooking and remove food when desired level of brownness has been achieved. We recommend using an instant-read probe to monitor the internal temperature of meat & fish.
TROUBLESHOOTING GUIDE
- How do I adjust the temperature or time while using a single Zone?
When a single zone is running the time or temperature can be adjusted at any time by pressing the up/down arrows.
- How do I adjust the temperature or time while using Dual Zones?
Select the desired Zone, then use the left arrows to adjust the temperature or the right arrows to adjust the time.
- Does the unit need to pre-heat?
The unit does not need to be pre-heated.
- Can I cook different foods in each Zone and not worry about cross contamination?
Yes, both Zones are self-contained with separate heating elements and fans.
- How do I pause the countdown?
The countdown timer will pause automatically when you select START/STOP and when you remove the drawers from the unit. Reinsert drawer within 10 minutes to resume cooking or the Zone with the drawer open will be cancelled.
- How do I stop one Zone when using both Zones?
Select the zone you want to stop, then press the START/STOP button.
- Is the drawer safe to put on my worktop?
The drawer will heat up during cooking. Use caution when handling and place on heat resistant surfaces only. DO NOT place the drawers on top of the unit.
- When should I use the crisper plate?
Use the crisper plate when you want food to come out crispy. The plate elevates the food in the drawer so that air can flow under and around it to cook ingredients evenly.
- Why didn't my food cook fully?
Make sure the drawer is fully inserted during cooking. For consistent browning, make sure ingredients are arranged in an even layer on the bottom of the drawer with no overlapping. Shake drawer to toss ingredients for even crispiness. Cook temperature and time can be adjusted at any time during cooking. Simply use the left arrows to adjust the temperature or the right arrows to adjust the time.
- Why is my food burned?
For best results, check progress throughout cooking and remove food when desired level of brownness has been achieved. Remove food immediately after the cook time is complete to avoid overcooking.
- Why do some ingredients blow around when air frying?
Occasionally, the fan from the air fryer will blow lightweight foods around. Use wooden cocktail sticks to secure loose lightweight food, like the top slice of bread on a sandwich.
- Can I air fry wet, battered ingredients?
Yes, but use the proper breading technique. It is important to coat foods first with flour, then with egg and then with breadcrumbs. Press breadcrumbs firmly onto the battered ingredients, so crumbs won't be blown off by the fan.
- How do I store the Probe away in the compartment?
Firstly insert the plug end into the storage compartment and wrap the lead round following the arrow.
- Why is the unit beeping?
Either the food is finished cooking or it indicates that the other Zone has started cooking.
- Why did the display screen go black?
The unit is in standby mode. Press the power button to turn it back on.
- Why is there an "E" message on the display screen?
The unit is not functioning properly. Please contact Customer Service at 0800 862 0453.

ninjakitchen.co.uk

Documents / Resources
References

- Ninja UK - Kitchen Appliances | Blenders, Air Fryers, Grills & More
Download manual
Here you can download full pdf version of manual, it may contain additional safety instructions, warranty information, FCC rules, etc.